Let’s be honest for a second. I have a confession to make. For years, I thought Bavarian nut tart was something you only got at a fancy patisserie in Munich, or worse, something you had to spend three days making for a special occasion. I bought the pre-made shells from the supermarket, felt guilty about the price tag, and never once considered making it myself. It felt like a recipe for failure before I even started. But then, last October, I was stuck in a bit of a rut. I wanted that warm, spiced, nutty comfort of an Oktoberfest afternoon, but I didn’t have the energy to bake a massive wedding cake or deal with a mountain of dishes.
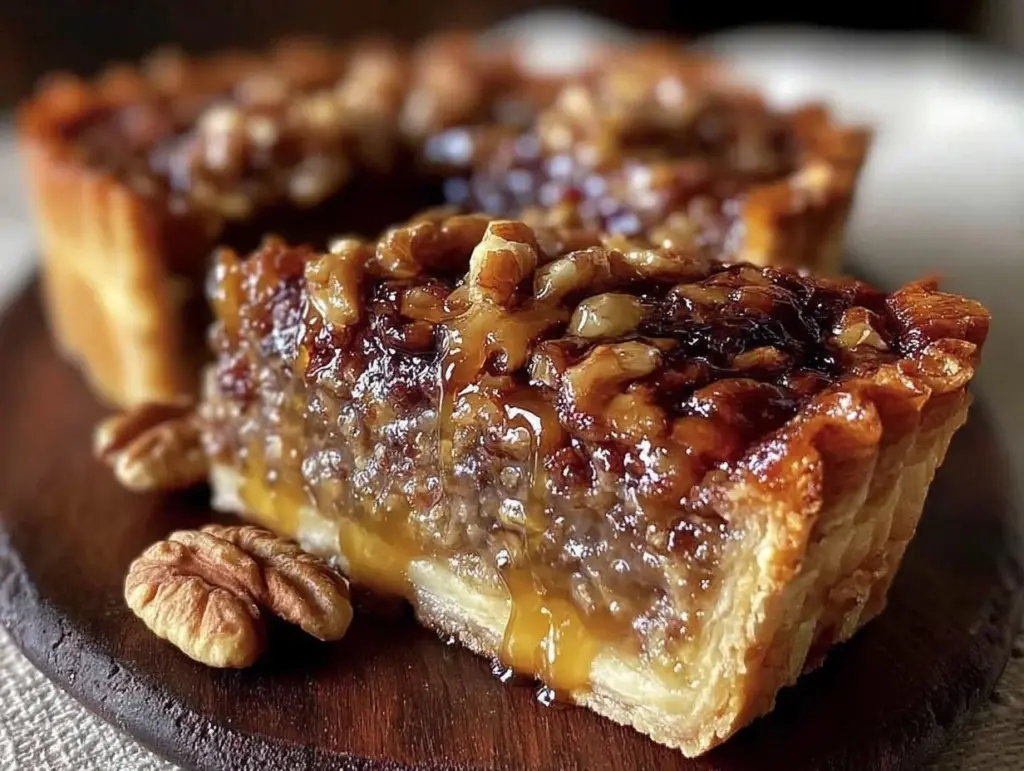
I needed a win. A quick, delicious, slightly indulgent win that screamed “I’m a good cook” but only took twenty minutes of actual hands-on time. That’s when I stumbled across the secret to the perfect Oktoberfest Nusstorte. It’s not the complicated, multi-layered masterpiece you see in bakery windows. It’s the rustic, home-style version—the one with the buttery shortcrust that shatters when you cut it and the gooey, cinnamon-kissed walnut filling that tastes like autumn in a bite. This isn’t just a dessert; it’s my answer to “what’s for dessert?” when I’m tired and don’t want takeout.
I’ve tested this specific method over a dozen times, tweaking the nut-to-syrup ratio until it was just right. The breakthrough? Using a simple syrup base instead of heavy pastry cream. It keeps the tart light, prevents the bottom from getting soggy, and cuts the prep time in half. If you’ve been intimidated by German baking, this recipe is your gateway drug. It’s forgiving, it’s fast, and it smells incredible while it bakes. So, put down the phone, preheat your oven, and let’s make this Oktoberfest Nusstorte together. It’s going to save your evening.
Why You’ll Love This Recipe
Lightning Fast — 30 minutes start to finish, and only 15 of those are active prep. I make this on weeknights when I get home at 7pm and realize I forgot to buy dessert. The dough comes together in one bowl, and the filling is just whisked syrup and nuts. No tempering eggs, no complex macarons.
Zero Waste — You use up those leftover walnuts from the pantry. I always have a bag of them sitting around, usually destined to go stale. This recipe gives them a second life and turns them into the star of the show. It’s smart cooking.
Authentic Flavor, Modern Ease — Most traditional recipes call for hours of chilling and rolling. This version uses a press-in crust method. It’s rustic, it’s messy in the best way, and it tastes just like the ones I had at the beer tents in Theresienwiese. The cinnamon and lemon zest cut through the richness of the walnuts perfectly.
One Dish Cleanup — Seriously. One mixing bowl, one baking tin, one spatula. I love a good bake, but I love a clean kitchen even more. This recipe respects your time and your effort.
This is my answer to “what’s for dinner” when I’m tired and don’t want takeout, extended to dessert. It’s the cozy hug your table needs.
Ingredients for Your Oktoberfest Nusstorte
Here’s the best part: you probably have most of this already in your kitchen. Bavarian baking is famous for being simple, honest, and unpretentious. You don’t need fancy flours or obscure spices. Let’s look at what you need for this Oktoberfest Nusstorte.
Butter (125g / ½ cup) — This is your base. Use cold, salted butter if you can. It adds that savory depth that makes sweet pastries interesting. Don’t use margarine; it lacks the flavor and texture we need for a flaky crust.
Plain Flour (250g / 2 cups) — Standard all-purpose flour works perfectly. You want something with a little protein to give the crust structure, but nothing too high-end. Cake flour will make it too crumbly.
Granulated Sugar (50g / ¼ cup) — Just enough to sweeten the dough slightly. The real sweetness comes from the filling, so don’t overdo it here. We want a neutral, buttery base.
Yolk (1 large egg yolk) — This binds the dough. Whites make dough tough; yolks make it tender and rich. If you’re worried about waste, save the white for an omelet or meringue.
Walnuts (200g / 2 cups, roughly chopped) — The star of the show. Use raw, unsalted walnuts. Toasting them first is optional, but I highly recommend it. It brings out the oils and makes them taste nuttier. Buy them in shells if you can; they’re fresher. If you buy pre-chopped, check for rancidity—it happens faster than you think.
Dark Brown Sugar (150g / ¾ cup) — This is crucial for that deep, caramel-like flavor. White sugar will make it too sweet and flat. The molasses in the brown sugar pairs beautifully with the cinnamon.
Heavy Cream (200ml / ¾ cup + 2 tbsp) — Full fat is non-negotiable here. You need the richness to create that glossy, fudge-like center. Low-fat cream will result in a dry, crumbly tart.
Cinnamon (1 tsp) — Ground cinnamon is warm and essential. If you have a stick, you can infuse the cream, but ground is easier and still delicious. Don’t skip it; it’s the scent of Oktoberfest.
Lemon Zest (1 medium lemon) — This is the secret weapon. The citrus cuts through the heaviness of the nuts and cream. It brightens the whole tart. Use organic lemons if possible, as you’re using the peel.
Salt (½ tsp) — To balance the sweetness. Always salt your baking, even sweet things. It makes the flavors pop.
Make-ahead note: You can mix the dough and press it into the tin up to 24 hours in advance. Just cover it tightly with plastic wrap and keep it in the fridge. This helps the gluten relax and makes it easier to handle later.
Equipment You’ll Need
You don’t need fancy equipment. Here’s what I actually use.
26cm Springform Pan — This is standard for tarts. It makes removal easy. If you don’t have one, a regular round cake tin lined with parchment works, but you’ll need to be careful when slicing.
Mixing Bowl — One large bowl is all you need for the dough. A medium bowl for the filling. No need for a stand mixer; this is meant to be done by hand.
Pastry Brush — Optional, but helpful for brushing the crust with milk or egg wash before baking for that golden shine. I often skip this for a more rustic look.
Whisk — Essential for the filling. You need to emulsify the cream, sugar, and spices until smooth. A fork won’t cut it; you want no lumps.
Step-by-Step Instructions
Alright, let’s make this! I’m walking you through exactly how I do it. Keep your oven ready to go.
1. Prep the Oven and Pan
Preheat your oven to 180°C (350°F). Grease your springform pan lightly with butter or line the bottom with parchment paper. This ensures nothing sticks, and cleanup is a breeze. Why it matters: Starting with a hot oven ensures the crust sets quickly, preventing the filling from soaking in too much and making it soggy.
2. Make the Dough
In your large bowl, combine the flour, sugar, and salt. Add the cold, cubed butter. Use your fingers or a pastry cutter to rub the butter into the flour until it looks like coarse crumbs. Don’t overwork it! You want pea-sized bits of butter remaining. Add the egg yolk and mix gently until the dough just comes together. Troubleshooting: If the dough is too dry and won’t hold together, add a teaspoon of cold water. If it’s too sticky, add a sprinkle more flour. Sensory cue: It should feel like damp sand.
3. Press the Crust
Transfer the dough to your prepared pan. Press it firmly into the bottom and up the sides. Use the bottom of a glass or your fingers to smooth it out. Make sure the edges are even. Why it matters: A thick edge prevents the filling from spilling over. Press it well so it doesn’t crack during baking.
4. Toast the Walnuts
While you’re pressing the dough, toast your walnuts in a dry pan over medium heat for 3-4 minutes. Shake the pan frequently so they don’t burn. You’ll smell them getting nutty and fragrant. Remove from heat and chop them roughly if they’re large. Tip: Don’t skip this step. Raw walnuts taste flat. Toasted walnuts taste like a bakery.
5. Make the Filling
In a separate bowl, whisk together the brown sugar, cinnamon, salt, and lemon zest. Add the heavy cream and whisk vigorously until the sugar is mostly dissolved. Stir in the toasted walnuts. Troubleshooting: If the cream is too cold, it might clump the sugar. Let it sit for 5 minutes to dissolve, then whisk again. The mixture should be pourable but thick.
6. Fill and Bake
Pour the walnut mixture over the crust. Smooth the top with a spatula. Bake for 25-30 minutes. Sensory cue: The edges should be golden brown, and the center should still have a slight jiggle. It will firm up as it cools. If it browns too fast, cover the top with foil.
7. Cool Completely
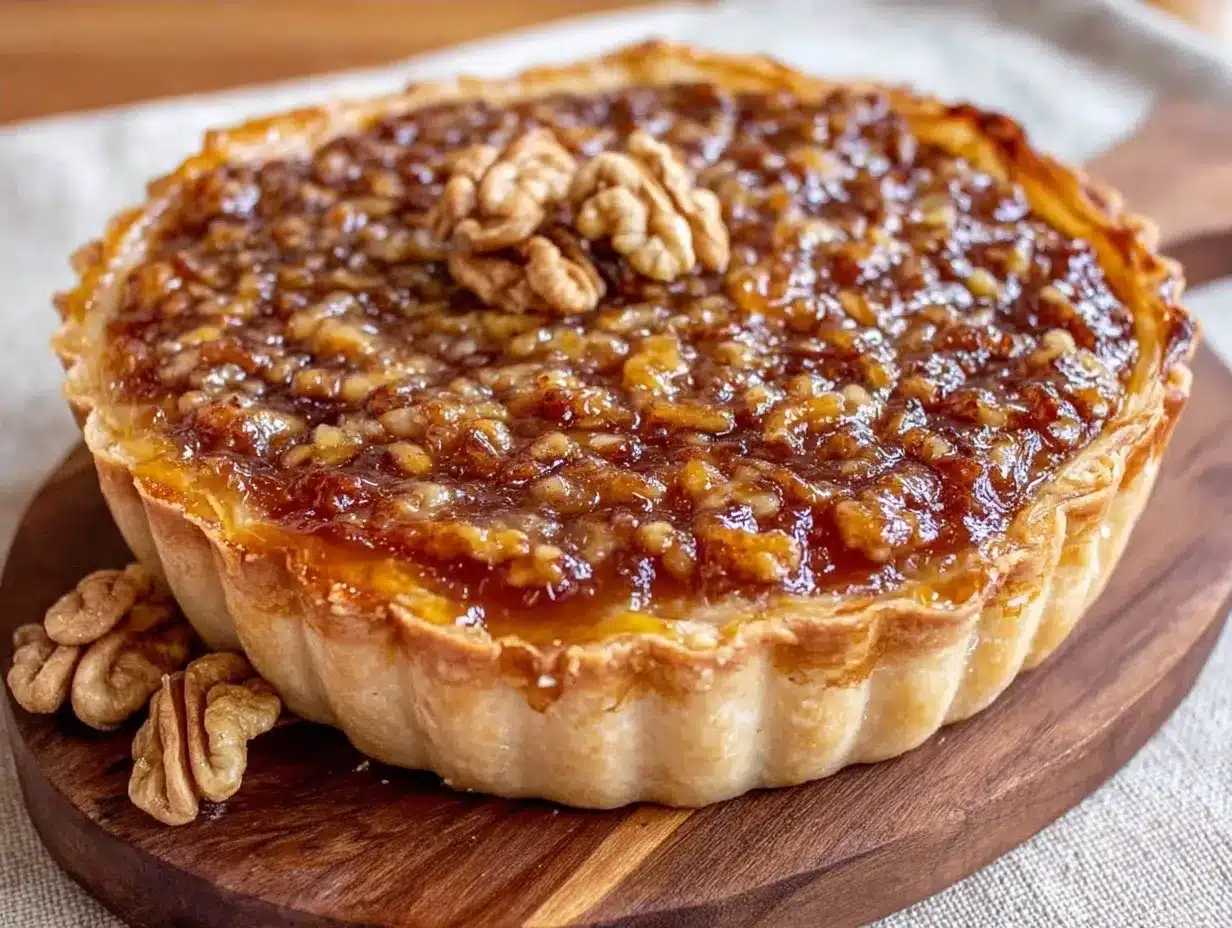
This is the hardest part. Let the tart cool in the pan for 10 minutes, then remove the ring. Let it cool completely on a wire rack. Why it matters: If you cut it warm, it will be a mess. The filling needs to set to get that perfect sliceable texture. This takes about 1-2 hours.
Total Time: 15 mins prep, 30 mins bake, 1 hour cool. Done.
Tips & Tricks
Here’s everything I’ve learned from making this dozens of times.
Don’t Skimp on the Lemon — I know, it’s a nut tart. But the lemon zest is what makes it taste professional, not homemade. It cuts the grease. Use a microplane for the finest zest.
Watch the Oven — Every oven is different. If your oven runs hot, check at 25 minutes. The sugar in the filling can burn easily. If you see dark spots, cover it.
Chill Before Serving — This tart tastes even better the next day. The flavors meld, and the texture becomes firmer. If you’re having guests, make it the night before.
Mistake: Soggy Bottom — This happens if the dough isn’t pressed firmly enough or if the filling is too watery. Ensure your dough is compact and your cream is at room temperature before mixing.
Pro Trick — Add a layer of ground almonds to the bottom of the crust before adding the filling. It acts as a barrier and adds extra crunch.
Variations & Substitutions
Once you’ve nailed the basic version, here’s how to mix it up. I’ve tried all of these.
Pecan Twist — Swap the walnuts for pecans. It’s slightly sweeter and more buttery. Great for Thanksgiving.
Gluten-Free — Use a 1:1 gluten-free flour blend. The texture will be slightly more crumbly, but the taste is identical. Add an extra egg yolk to help bind it.
Dairy-Free — Use coconut cream instead of heavy cream. It adds a slight coconut flavor, which pairs surprisingly well with cinnamon and nuts. Use vegan butter for the crust.
Lighter Version — Use half cream, half milk. It’s less rich, but still delicious. The texture won’t be as fudgy, but it’s easier to eat in larger portions.
Serving & Storage
Serve this Oktoberfest Nusstorte with a dollop of whipped cream or a scoop of vanilla ice cream. It pairs beautifully with a strong black coffee or a glass of Riesling. For sides, I love it with a simple apple salad or some roasted pears.
Fridge Storage: Keeps for up to 4 days in an airtight container. It actually gets better after day 2.
Reheating: Eat it cold or at room temperature. If you want it warm, microwave a slice for 10 seconds. Don’t bake it again; it will dry out.
Freezing: You can freeze whole slices for up to 3 months. Wrap tightly in plastic and foil. Thaw in the fridge overnight.
Meal Prep Tip: Cut into squares and freeze them individually. Grab one for a quick afternoon snack.
FAQs
Q: Can I use pre-chopped walnuts?
A: Yes, but check them first. Pre-chopped nuts can go rancid quickly. If they smell like crayons or paint, toss them. Freshly chopped is always best for flavor.
Q: Why did my tart crack on top?
A: This is normal for nut tarts. It happens as the filling sets and contracts. It doesn’t affect the taste. If you want a smooth top, you can cover it loosely with foil for the last 10 minutes of baking.
Q: Can I make this in a pie dish?
A: Yes, but you’ll need to adjust the baking time. It might take 5-10 minutes longer. Check for doneness by looking for golden edges and a set center.
Q: Is this similar to other German desserts?
A: It’s close to Oktoberfest Apfelstrudel in terms of comfort, but much easier. It’s also similar to Oktoberfest Käsespätzle in its hearty, satisfying nature, but obviously sweeter!
Q: How do I get clean slices?
A: Use a sharp knife and wipe it clean between cuts. Dip the knife in hot water for a few seconds before slicing. This ensures smooth, clean edges without squishing the filling.
Final Thoughts
Making this Oktoberfest Nusstorte doesn’t have to be a chore. It’s a quick, satisfying way to bring a bit of Bavarian charm to your kitchen, even in the middle of a busy week. I hope you love it as much as I do. It’s become a staple in my home, especially when the air gets crisp and I crave something warm and nutty. Don’t be afraid to experiment with the spices or nuts. Make it your own.
Drop a comment and tell me how it turned out! Did you add extra cinnamon? Did you use pecans? I love hearing about your kitchen adventures. And if you need more quick wins, check out my Oktoberfest Brezeln recipe for the perfect savory pairing. Happy baking!
Pin This Recipe!
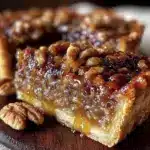
Oktoberfest Nusstorte
- Total Time: 45 Minuten
- Yield: 8 Portionen 1x
Description
Ein rustikaler, hausgemachter bayerischer Nusskuchen mit butterartigem Mürbeteig und einer cremigen, zimtigen Walnussfüllung. Dieses Rezept ist schnell zubereitet, erfordert nur eine Schüssel und liefert authentischen Oktoberfest-Flavor ohne viel Aufwand.
Ingredients
- 125g kalte, gesalzene Butter
- 250g Allzweckmehl
- 50g Kristallzucker
- 1 großes Eigelb
- 200g rohe, ungesalzene Walnüsse (grob gehackt)
- 150g dunkler Braunzucker
- 200ml + 2 EL Schlagsahne (vollfett)
- 1 TL Zimt (gemahlen)
- 1 Bio-Zitrone (gerieben)
- ½ TL Salz
Instructions
- Heizen Sie den Ofen auf 180°C (350°F) vor. Fetten Sie eine 26cm Springform leicht ein oder legen Sie den Boden mit Backpapier aus.
- Kombinieren Sie in einer großen Schüssel Mehl, Zucker und Salz. Geben Sie die kalt gewürfelte Butter hinzu und reiben Sie diese mit den Fingern oder einem Teigschaber in das Mehl, bis die Konsistenz groben Semmelbröseln ähnelt. Achten Sie darauf, dass erbsengroße Butterstücke erhalten bleiben.
- Geben Sie das Eigelb hinzu und vermengen Sie es vorsichtig, bis der Teig gerade so zusammenhält. Die Konsistenz sollte wie feuchter Sand sein. Falls der Teig zu trocken ist, fügen Sie einen Teelöffel kaltes Wasser hinzu; bei zu viel Klebrigkeit etwas mehr Mehl.
- Drücken Sie den Teig fest in den Boden und die Seiten der Springform. Glätten Sie die Kanten, um ein Überlaufen der Füllung zu verhindern.
- Rösten Sie die Walnüsse in einer trockenen Pfanne bei mittlerer Hitze für 3-4 Minuten, bis sie duften und nussig schmecken. Nehmen Sie sie vom Herd und hacken Sie sie grob, falls nötig.
- Vermischen Sie in einer separaten Schüssel Braunzucker, Zimt, Salz und Zitronenschale. Rühren Sie die Schlagsahne kräftig ein, bis der Zucker sich weitgehend aufgelöst hat. Heben Sie die gerösteten Walnüsse unter.
- Gießen Sie die Walnussmischung über den Teigboden und glätten Sie die Oberfläche mit einem Spatel.
- Backen Sie den Kuchen für 25-30 Minuten. Die Ränder sollten goldbraun sein, und die Mitte sollte noch leicht wackeln. Falls die Oberseite zu schnell bräunt, decken Sie sie mit Alufolie ab.
- Lassen Sie den Kuchen 10 Minuten in der Form abkühlen, entfernen Sie dann den Springformring und lassen Sie ihn vollständig auf einem Gitter abkühlen (ca. 1-2 Stunden), damit die Füllung fest werden kann.
Notes
Der Teig kann bis zu 24 Stunden im Voraus vorbereitet und im Kühlschrank aufbewahrt werden. Für einen knusprigeren Boden kann eine Schicht gemahlener Mandeln auf den Teigboden gestrichen werden, bevor die Füllung hinzugefügt wird. Der Kuchen schmeckt am nächsten Tag noch besser, da sich die Aromen verbinden. Lagern Sie ihn luftdicht im Kühlschrank für bis zu 4 Tage.
- Prep Time: 15 Minuten
- Cook Time: 30 Minuten
- Category: Dessert
- Cuisine: Deutsch
Nutrition
- Serving Size: 1 Stück (ca. 1/8 des
- Calories: 450
- Sugar: 28
- Sodium: 250
- Fat: 32
- Saturated Fat: 14
- Carbohydrates: 38
- Fiber: 3
- Protein: 6
Keywords: Oktoberfest, Nusstorte, bayerischer Kuchen, Walnusskuchen, schnelles Dessert, Herbstrezept, glutenfrei Option, hausgemacht